
How Can We Help?
Manually Importing Jobs (Basic)
Before reading this article please make sure you’ve followed the guided tutorial for detailed introduction about each of the steps of the import process.
In addition to Quick Help and the Quick Tour, detailed guidance is available throughout the importer. Hover over the “?” icons to view helpful tips for the available options.
Importing Jobs
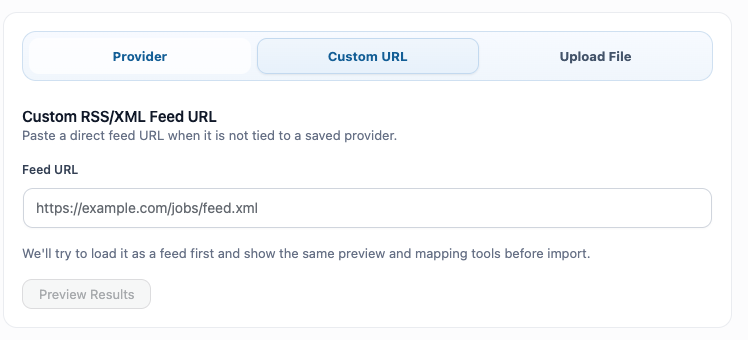
Importing jobs is as simple as pasting a valid jobs RSS feed under the Custom URL tab:
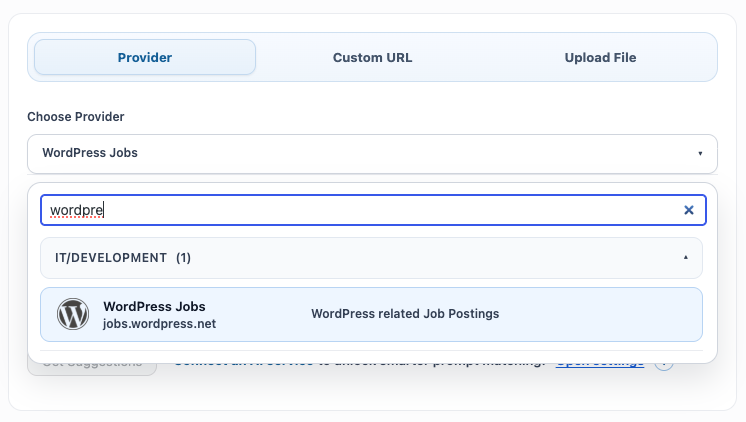
You can also choose a feed from the pre-set list of providers. Browse or use the predictive search to find a good job provider for your site target:
When you select a provider, Go Fetch Jobs displays the filters and options available for that provider. Adjust the filters to define which jobs you want to import, then click Preview Results to retrieve a sample of the matching jobs.
Depending on the provider and your plan, different filters may be available. Some providers expose only a feed URL, while others offer additional options such as keywords, location, category, date or company.
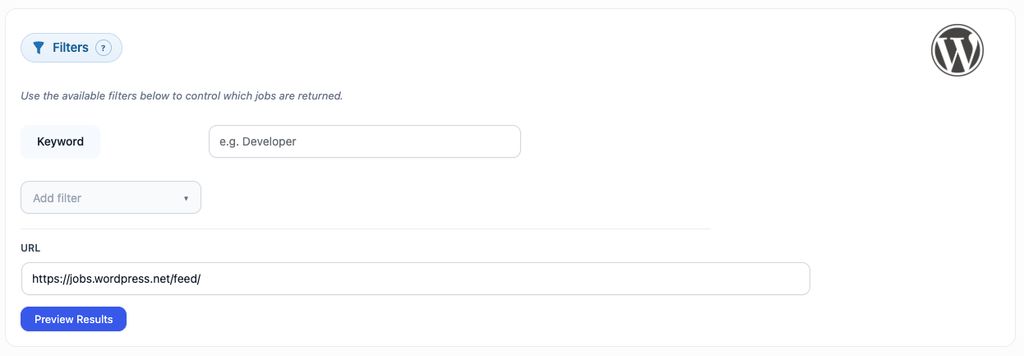
You can also edit the pre-set provider URL if you need to fine tune it.
If you are importing from a feed that is not available as a preset provider, select Custom URL and paste the feed URL manually.
Preview and Field Mappings
After you have your feed ready, you can see a sample of its content by clicking Preview Results:
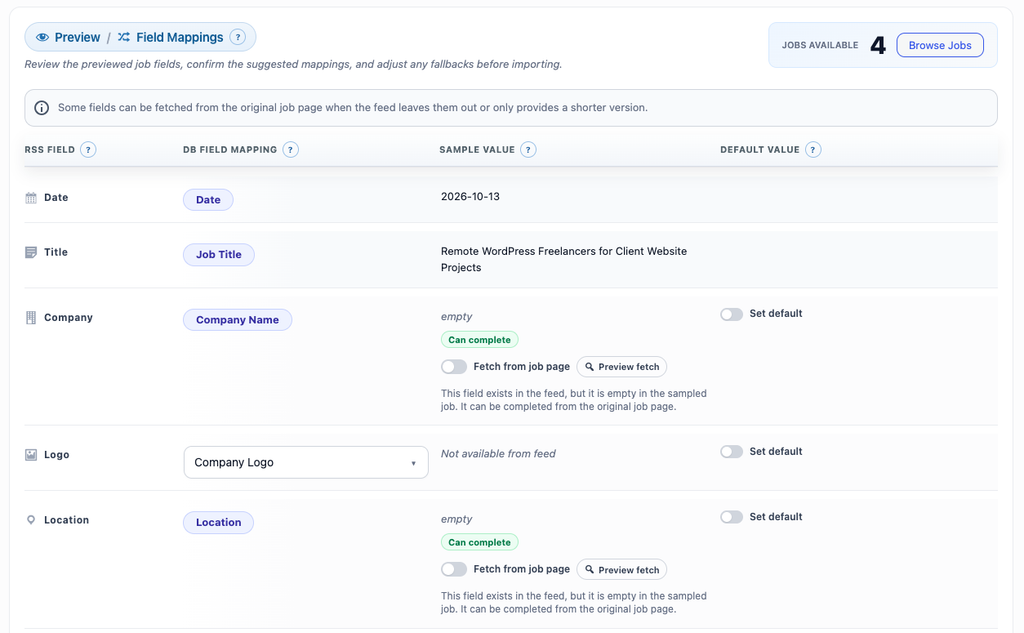
After you click Preview Results, Go Fetch Jobs displays a sample of the jobs returned by the selected provider or feed, together with the total number of jobs available.
The Preview / Field Mappings section shows:
- the fields detected in the feed
- the database field each value will be mapped to
- a sample value from the returned jobs
- optional default values for fields that are missing or empty
The fields shown depend on the provider and the content available in the feed. Common fields include:
- Date
- Title
- Description
- Company
- Location
- Logo
- Job Type
- Job Category
- Expiry Date
- Country
- Latitude
- Longitude
Not every provider supplies all of these fields. Some feeds may only contain basic information, such as the job title, date, description and link.
Set Default
This option lets you define a fallback value for a field. The default is used when the feed does not provide a value or when the imported value is empty.
For example, you can set a default company, location, job type, job category or logo. Values provided by the feed normally take precedence over the default value.
For fields such as Job Type, Job Category or Expiry Date, enabling Set default may display an additional control where you can select or enter the value to apply.
Can Complete (premium plans only)
When a field is empty or missing, you may be able to assign a default value. For supported providers, some fields may also display the Can complete option. This allows Go Fetch Jobs to retrieve missing or incomplete values from the original job page toggling the Fetch from job page option.
The Can complete option is only available on premium plans and only for providers that support fetching additional data. Its availability depends on the provider and the fields it exposes.
If a field is marked as Not available from feed, that value was not included in the source feed. It can only be populated through a default value or, where supported, by fetching data from the original job page.
The sample values represent the data available to the importer from the selected source. If the feed only provides a short description, that is the content that will be imported unless the Can complete option is available and enabled.
Import Settings
Additional import values and field defaults are also configured on the the Preview / Field Mappings section.
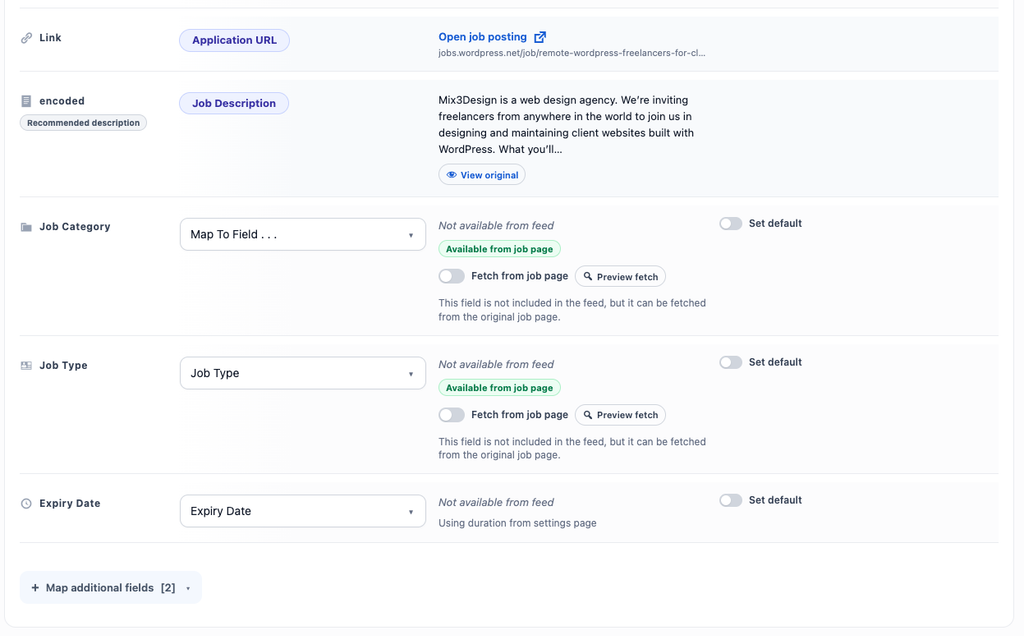
You can:
- map feed fields to your job fields
- assign default values for missing fields
- set default job categories and job types
- configure expiry dates and other import values
These settings are saved with the template and used whenever the template is loaded manually or by a schedule
Completing Missing Metadata
Some feeds provide only basic information, such as the job title, link and a short description. Other fields, such as the company name, location, logo or full description, may be missing or incomplete.
For supported providers, premium plans can use the Can complete option to fetch missing values from the original job page. This option is available at field level in the Preview / Field Mappings section.
The fields that can be completed depend on the provider and its page structure. Fetching additional data may increase the import time because Go Fetch Jobs needs to request the original job page.
If the Can complete option is not available, missing values can still be handled by assigning a default value or leaving the field empty.
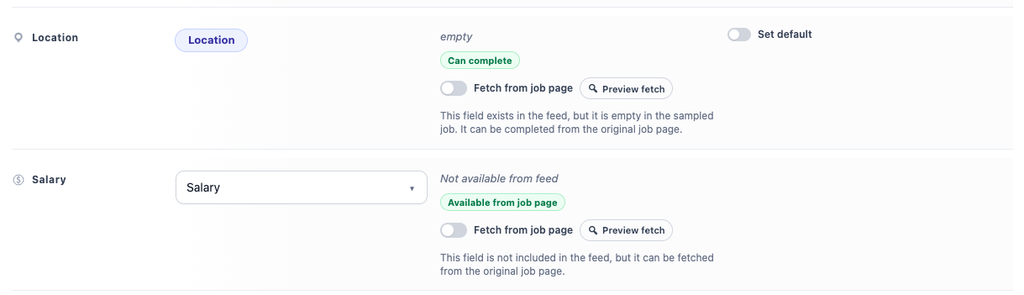
(*) IMPORTANT: Before enabling Can complete, make sure you understand and comply with the provider’s copyright and content-use requirements.
When importing additional content from the original job page, keep the automatic provider attribution and link on each imported job. It is recommended not removing or hide the original source information.
Save Template
Once you have reviewed the mappings, defaults and post-process filters, you can save the current setup as a reusable template.
A template stores the selected provider, filters, mappings, defaults and relevant import settings. Saved templates can be loaded later for manual imports or attached to scheduled imports.
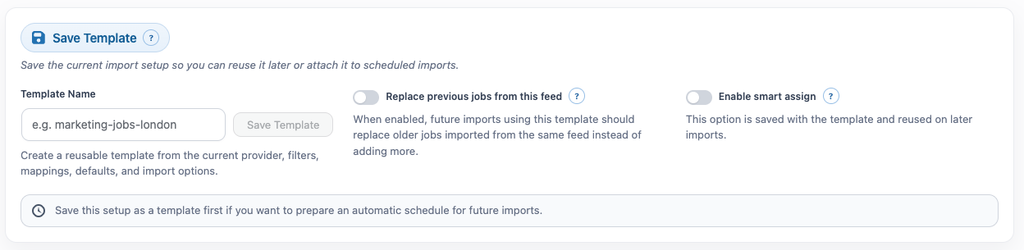
You can describe your template name as well as:
- Enable smart assign: allow supported plans to automatically assign suitable job categories and job types.
- Replace previous jobs from this feed: optionally replace older jobs imported from the same source.
Tip: Saved templates can also to be used for Scheduled Imports (premium plans only).
Import Options
After saving the template, review the options for the current import run, such as the importer author, job limit, smart assignment and replacement behavior. These options may vary depending on the provider and your plan.
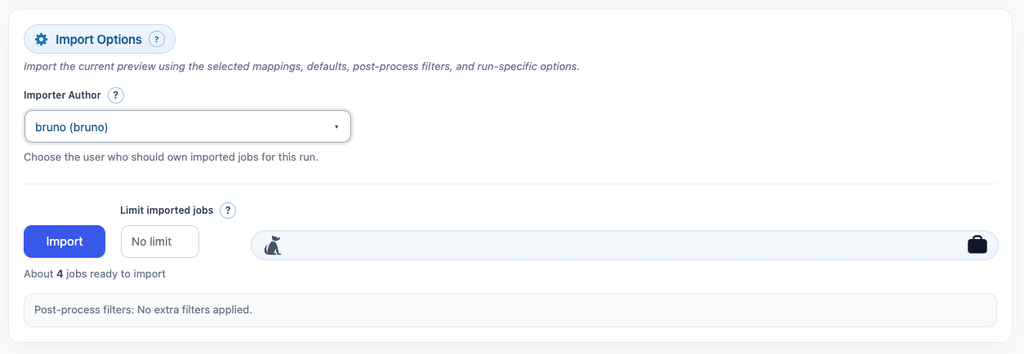
Before importing, you can review the final import options:
- Importer Author: choose the WordPress user who will own the imported jobs.
- Limit imported jobs: limit the number of jobs imported during this run.
The available options may vary depending on the provider, the selected plan and the current import configuration.
Go Fetch Jobs!
You’re on the last step! Just click the Import button to start the import process You’ll be presented with a dog running while the jobs are being imported:

When the process finishes, you’ll be presented with a report that contains some stats about the imported jobs:

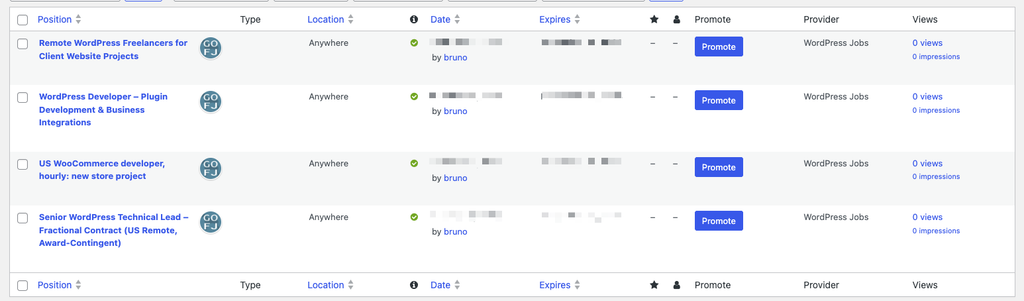
At this point you can now visit your backend job listings page to see all the imported jobs which are now on your database just like manually user submitted jobs:
Congratulations!
You’re ready to start your imports! If you need more granular control over the jobs being imported please read the article for the advanced mode.
Related Articles